This is a comprehensive guide to download, install and manage the DQ for Dynamics™ CRM solution.
Guide contents:
1. Solution Download
a) Visit the DQ for Dynamics™ Download page to download the necessary files.
b) Download either the Online Solution or IFD Or On Premise Solutions (depending on your deployment type).

2. Solution Install
a. Head over to the Power Apps Maker Portal.
b. Select the Environment into which you will install DQ for Dynamics™ Consolidate.

c Now that you are in your desired environment, swap to the Solutions tab, and click the Import Solution button.

d. This will open up in the Solution Import Wizard, and prompt you to select a ZIP file (which you downloaded during Step 1).
e. Once you have selected the ZIP file, simply click Import and it will begin importing.

f. The next step of the Install wizard is the Environment Variable configuration, all of this can be edited later, so just click import.
g. You will now see a notification at the top letting you know the status of the import.

This will turn green once the solution has finished importing.

h. If you now open the CRM, you will now see that a new Model Driven app has been installed.
Note: Users will need a security role before they can see the app. Instructions for this can be found in Section 4 Adding Additional Users.
3. Provisioning
Provisioning will allow DQ for Dynamics™ to connect directly to your CRM system.
a) First, you must decide which connection method to use. Please use one of the two links below and follow the guide to creating the credentials.
Provisioning Types
- Client ID & Secret (Recommended)
- This creates an API integration with no front-end access and does not require a Dynamics license.
- This allows API access to an existing front-end user and does require a Dynamics license.
b) Once you have finished setting up your desired connection method, head back into your CRM and open the DQ for Dynamics™ Consolidate app as seen during installation.
c) You will now be asked to choose which region you want to use.

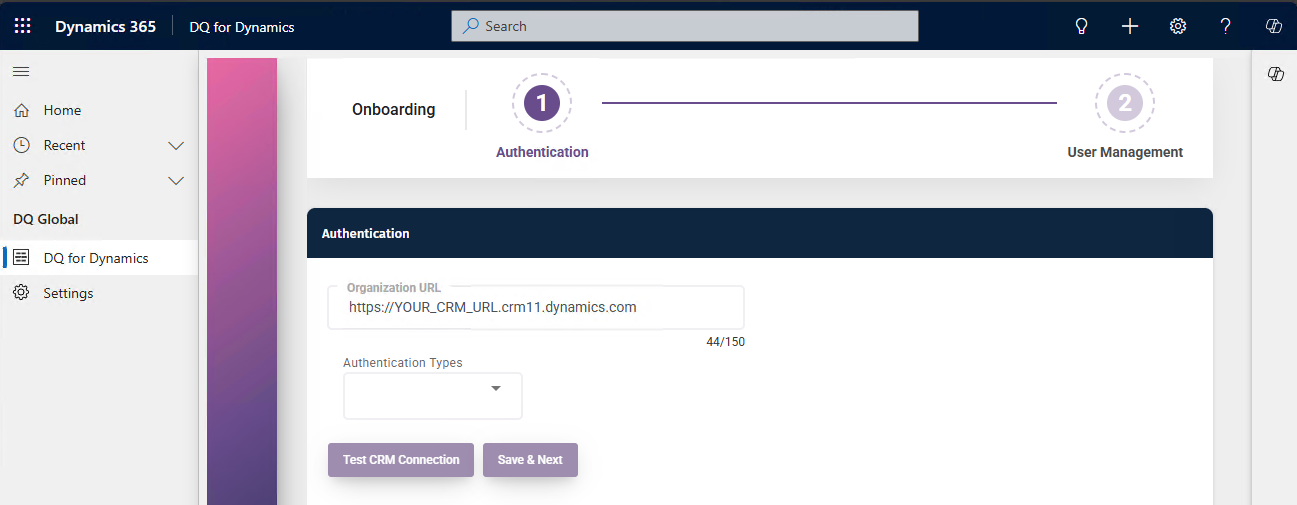
d) You will now be taken through an onboarding wizard.
Note: If you see a message saying "Organization URL is invalid!" then the fulfilment team have not yet completed the license setup, so please give us some time and continue the rest of this guide once that has been completed.
In Step 1, enter the credentials you created a moment ago.
In Step 2, you have the opportunity to give additional users access to the app.
Note: They will still need to be given a security role before they can see the app within CRM. Instructions for this can be found in Section 4, Adding Additional Users.

e) Click Save & Exit, and you will now be in the application.
4. Additional User Setup (Optional)
This section will contain how to give additional users access to DQ for Dynamics™ Consolidate.
These additional Users may have one or both of the following roles within DQ for Dynamics™:
- Administrator
- Reviewer
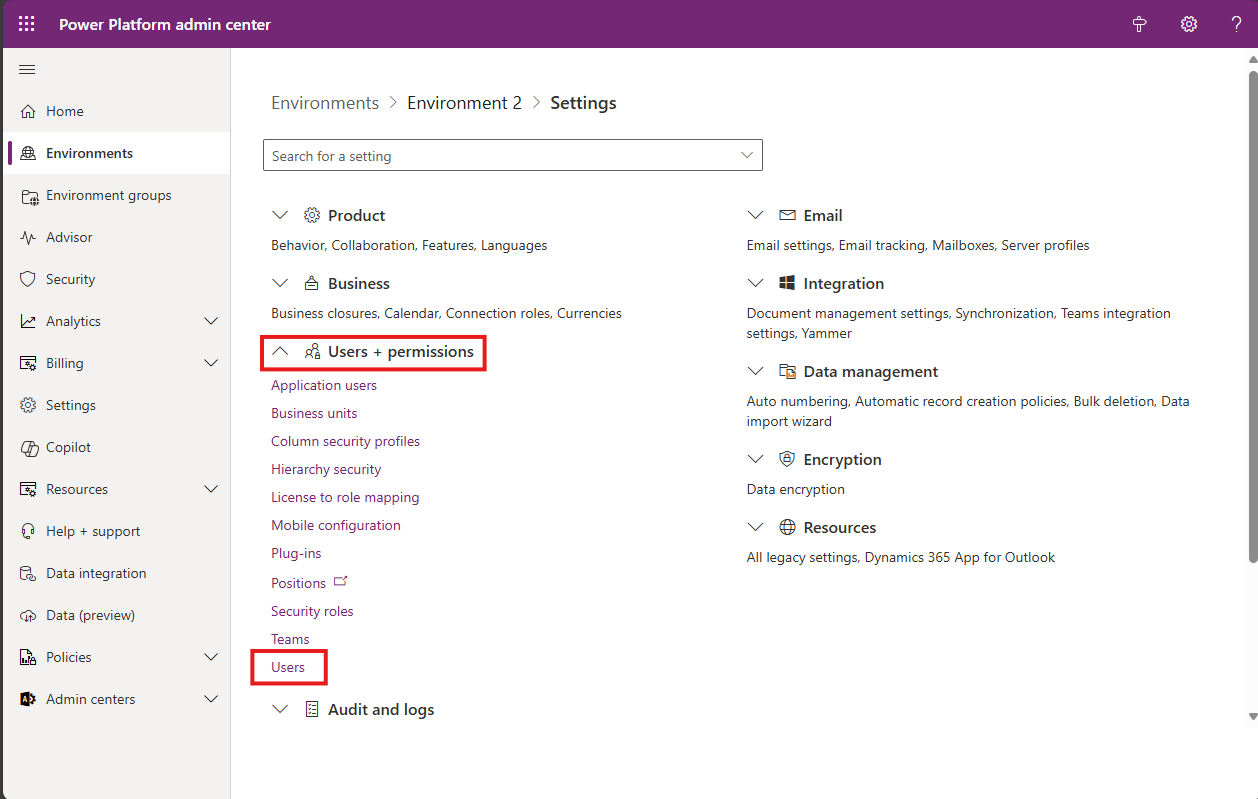
a. Head over to the Power Platform Admin Center.
b. Select the Environment where you have installed DQ for Dynamics™ Consolidate, and select Settings on the top navigation bar.

c. Expand the Users + Permissions section, and click the Users option.
d. Locate the user you wish to add, and click on the 3 dots, then select Manage Security Roles.

e. Add either the DQReviewer or the DQAdmin role, and click Save.

Next, we will need to swap back to the DQ for Dynamics™ Consolidate app.
f. Go to Settings > Manage Users
g. Select the Add New User button represented by the '+' symbol.
Search for the user my email, select the appropriate role(s) for the additional User. Select Save.

h. Select Save at the bottom of the screen.
The newly added Users will now have access.
|
|
|
|
|
|
|
|
|
|
| |
|
|
Installation |
| Settings |
| Create a Session |
| Home Screen & Scheduler |
Download and install your Consolidate Solution. |
| The foundation for creating your sessions. |
| A 5-step process to finding your matches. |
| Your Applications Landing Page. . |
|
|
|


Was this article helpful?
That’s Great!
Thank you for your feedback
Sorry! We couldn't be helpful
Thank you for your feedback
Feedback sent
We appreciate your effort and will try to fix the article