Guide contents:
Single Entity
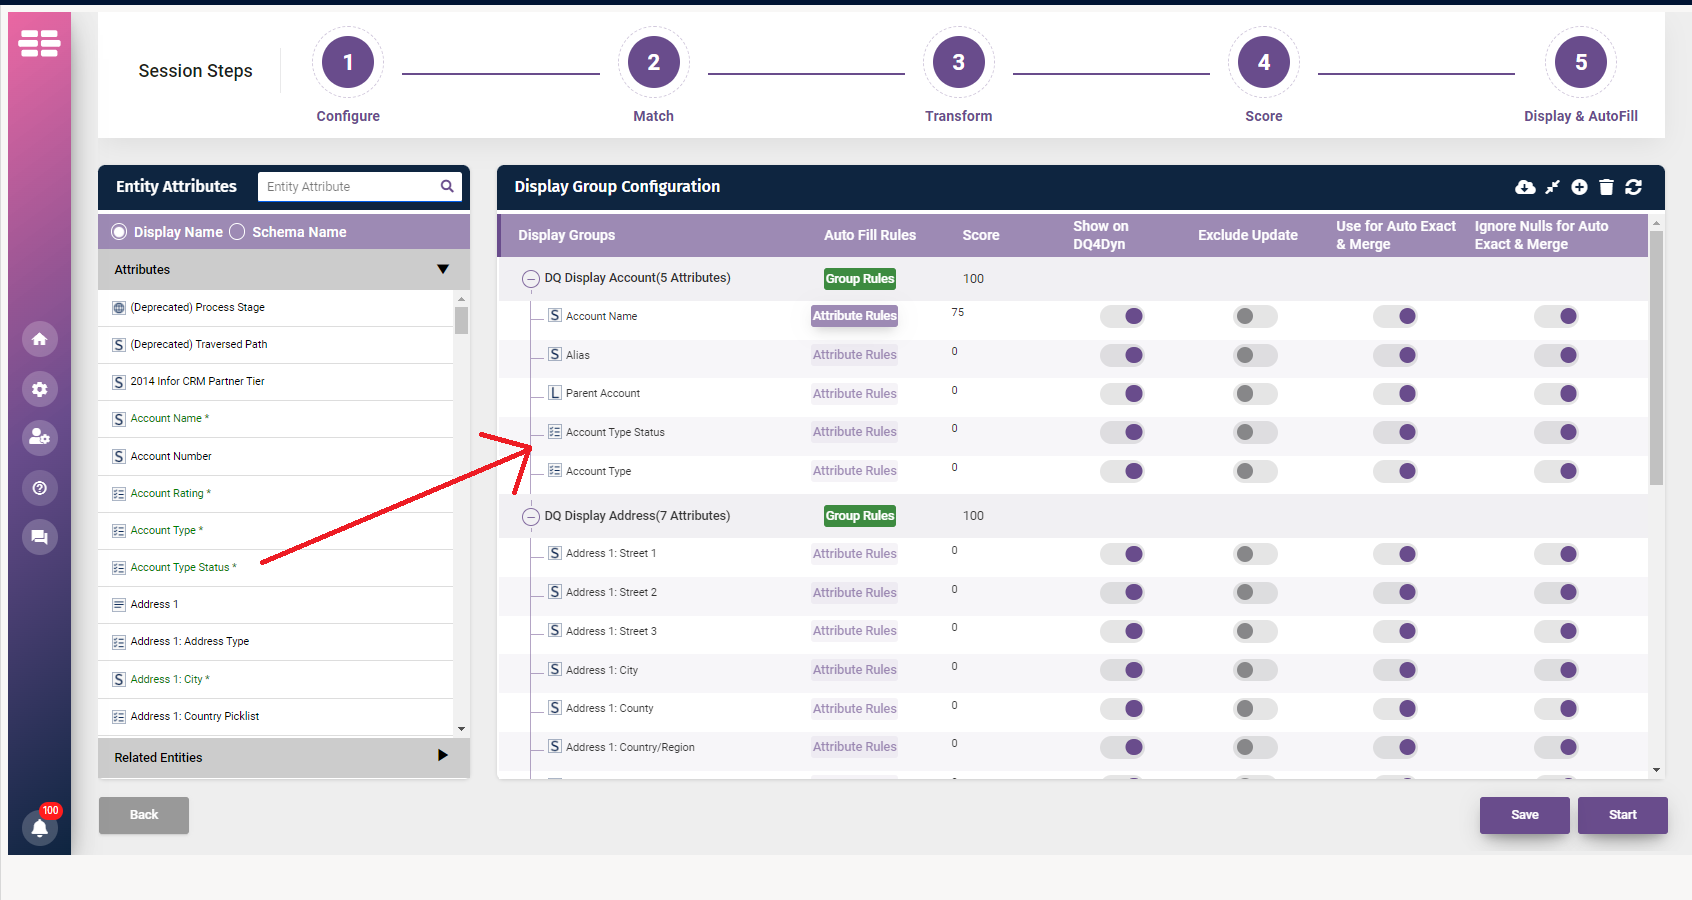
This page details Step 5 of the 'Creating a Session' process.
This screen will be populated with the pre-configuration defined by the Admin User under the 'Display & Autofill Settings' found within 'Settings' (See below). 
In this Step 5, you can manually configure the record fields you wish to see within the duplicate review screen, to allow you to review the duplicated records with accuracy.
Changing the configuration within Step 5 is limited to the current session and will NOT change the global settings for future match sessions. Entity attributes cannot be changed in this step (i.e. deleting a group section or adding a section but it won’t be saved).
Additionally, you can choose to utilise our Clone Form Attributes function:

- Clone Form Attributes: Select this function if you would like DQ to read all fields or attributes that currently exist within the chosen form from the entity. Utilising this function allows you the option to automatically populate your display and autofill settings with the existing attributes direct from your form.
- This will allow you to have all the form fields visible to you when manually reviewing grouped records in the Duplicate Review Screen.
Cross Entity
The only difference between Single Entity Matching vs Cross Entity Matching in this step is the addition of the 'Target' Column in the output display.
Other than this, the process remains the same as a single entity configuration.
Related Entities
This section explains how to enable the functionality of displaying related entity counts on the review screen.
In this example, we will run through adding Opportunity counts to the review screen when running a session on the Account entity.
First, to include related tables, go to Settings and then navigate to Advanced Settings.

Within Advanced Settings, select Related Entities and select the appropriate entity. In this example, we will select the Account entity. This will open the Advanced Settings, where you can scroll to Related Entities configuration.

Select the related entities that you would like to return counts for under the Include for Display Setting Configuration header. In this example, we have checked the Include for Display Setting Configuration box within the Opportunity row, which will enable the addition of Opportunity attributes for matching. After checking the appropriate box, select Save.

After returning to session creation, you will notice that Opportunity is now present under Related Entities within the Entity Attributes section on the left hand side of the screen.

Similar to standard configuration, you can drag and drop any related entities you would like to return counts for into the Related Entities Display Group.

Auto Fill Rules
These settings will be used to define the rules against any attribute section/group/field for the conditions below:
- A ‘Group Rules’ hyperlink will appear against the section/group and a ‘Attribute Rules’ hyperlink will appear against the field/attribute.
- If no rules have been assigned at Group level, the 'Group Rules' icon will appear in a light green colour. When a rule is applied the icon will turn a dark green colour.
- If no rules have been assigned to an Attribute, the 'Attribute Rules' icon will appear in a light blue colour. When a rule is applied the icon will turn a dark blue colour.
- If you define a rule at group level then all attribute based rules will be overridden and the ‘Attribute Rules’ hyperlink will be greyed out against these fields.
- Session level display and Auto Fill settings will override the Global Level Display and Auto Fill Settings. Also note, users cannot drop the same rule more than once.
- If you want to apply specific rules against fields/attributes, where a group rule has been applied, then the group rules will need to be removed via the ‘Group Rules’ hyperlink. When the Group Rules have been removed, then the ‘Attribute Rules’ hyperlink will be enabled allowing you to define the attribute rules. A prompt will be shown to you while updating/modifying the rules configuration.
Group Rules
Clicking on the ‘Group Rules’ hyperlink, the below pop-up window will appear:

- Currently, there are three rules that can be applied to a group of attributes. They are as follows:
Group Completeness - Select the group that contains the most/least values within this specific group.
Modified on - Selects the group by analysing the Newest/Oldest modified date. (This is decided by interrogating the default ModifiedOn attribute value.
Created on - Selects the group by analysing the Newest/Oldest created on date. (This is decided by interrogating the default CreatedOn attribute value.
Related Attribute (NEW) - Group selection is decided upon another attribute value.
Attribute Rules
Attribute rules are rules applied to select the best data in a particular field. The rules vary dependant upon the data type to provide you with the functionality you need to automate the reallocation of data in an automated process.
Rather than go through each data type individually, here is a description of all the Auto-fill rules. Some rules are specific to each data type, some are generic.
Once you click on the 'Attribute Rules' Icon, you will receive a pop up like this:

You will then be able to drag specific rules from the list on the left, and drop them onto the groups on the right. The rules you can set are as follows:
- Occurrence: Most or Least Occurring Value
- Length: Longest/Shortest Value
- String Value: Set to 'No/N/0/-1' or 'Yes/Y/1'
- Unique value populates an empty field: Any value will populate this field on the master record
- Related Attribute: Field value selection is made upon the criteria of another field value
- Modified On: Newest/Oldest date
- Default Value: Set a Default
- Equal: Select if value equals the value defined
- Contains: Select field value if it contains 'x'
- Begins With: Select field value if it begins with 'x'
- Ends With: Select field value if it ends with 'x'
- Contains Data: Select value if it contains data and the master does not
- Hierarchy of Values: Define winning values by selecting and ordering a hierarchy of values
- Default Value if Null: Set to 'x' if null
- Regular Expression: Analyse a string pattern and format accordingly
- Boolean: True/False
- Date: Newest/Oldest Value
- Number: Highest/Lowest Value
- Merge and Dedupe Multi-Select Values: Merge Multiselect values and then deduplicate values
- Retain Master Values: Only retain master record values on a multi select option set when merged
- Image: No Auto-Fill Rules Available
The toggle buttons are the final steps which can be configured.

Show on DQ for Dynamics: This setting will be used to determine the attributes to be displayed in the Duplicate Review Screen. By default, this will be toggled 'on'. If required, you can un-toggle, which will hide the attribute from the Duplicate Review Screen. You can also un-toggle a section/group and the entire section/group including its attributes will be hidden from the Duplicate Review Screen.
Exclude Update: Select this option to restrict the attributes so that they cannot be updated on DQ for Dynamics Review Screen using ‘Manual Fill’ or ‘Auto Fill’ Process.
Use for Auto Exact & Merge: Select this option to consider the attributes for the Auto Exact & Merge process on the DQ for Dynamics Review Screen. If all the checked attributes are an exact 100% match against the Master Record, all associate duplicates are “Auto Accepted” and “Auto Merged” with The Master Record and subsequently De-activated in the Auto Exact & Merge Process.
Ignore Nulls for Auto Exact & Merge: This option is selected by default and ignores null matches while processing ‘Auto Exact & Merge’. If you want to consider null fields as exact matches, un-toggle for the respective fields provided the field is used for ‘Auto Exact & Merge’.
Was this article helpful?
That’s Great!
Thank you for your feedback
Sorry! We couldn't be helpful
Thank you for your feedback
Feedback sent
We appreciate your effort and will try to fix the article